This Thanksgiving Window Clings craft was first shared in 2014. It has been updated and revised. (September 27, 2020.)
The unexpected result of making Halloween DIY window clings, like the bats and jack o’lantern we’ve previously shared, is that the bare windows stick out like a sore thumb once you take them down!
Our neighbors are BIG on holiday decorating. Inflatables, props, pumpkins, and wreaths adorn just about every house!
(I really need to do a better job decorating….) To be honest, I love making decor items but don’t love storing and reusing them year after year. We don’t throw most of them away (though several of my favorites went missing after we moved.) It’s easier – and more fun – to make new items each year than to climb into the attic to find the right bin.
Besides, kid made window clings don’t really store well. You can technically peel them from the windows and put them on wax paper or freezer paper but it is difficult to keep from tearing them.
Also more people own Cricut Machines these days, which arguably make “professional” vinyl decals with the click of a few buttons and some vinyl. However, machine cut decals aren’t quite as fun to make with kids and are far more expensive!
This is a kids craft, after all.
One problem I have with our handmade window clings is how difficult it is to take the cling off of the wax paper sometimes. The paper residue easily wipes off with a wet paper towel or rag.
Each new cling is a chance to improve on the process.
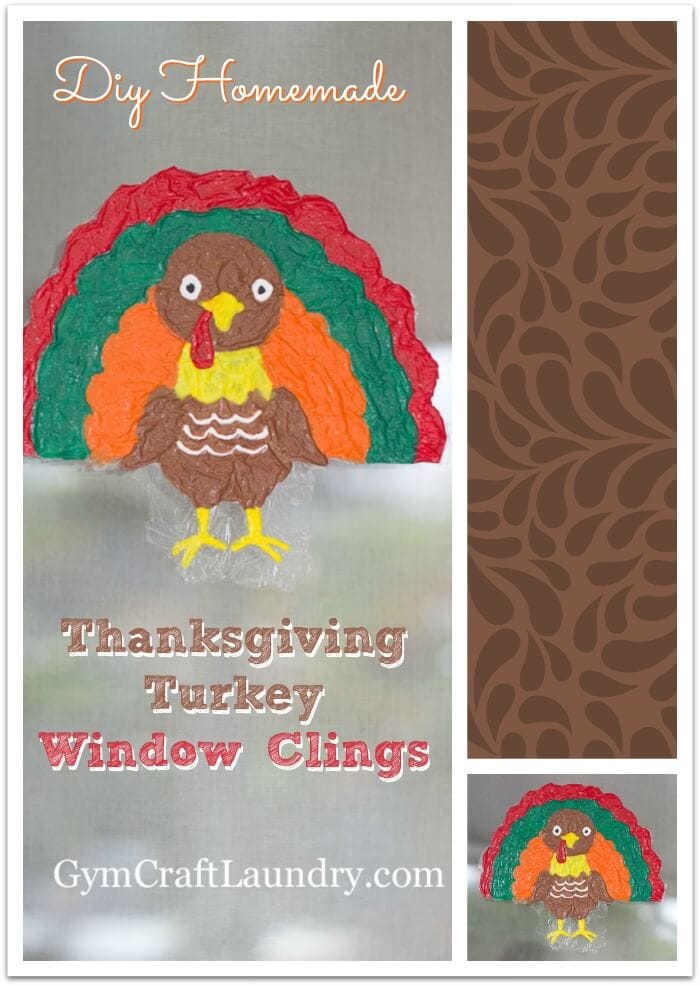
Thanksgiving DIY Window Clings
- [easyazon_link identifier=”B003OWRA72″ locale=”US” tag=”scrugcorne-20″]Gallon Size Zip Top Bag[/easyazon_link] (We used [easyazon_link identifier=”B002HNW6PK” locale=”US” tag=”scrugcorne-20″]plastic wrap[/easyazon_link] on our 2014 turkey clings and wax paper in past tutorials. Use what you have! The heavier plastic bag makes removing the cling to place on the window super easy.)
- [easyazon_link identifier=”B01FE1JTDI” locale=”US” tag=”scrugcorne-20″]3D Fabric paint[/easyazon_link] aka puffy paint
- Turkey clip art or coloring pages, printed out
- [easyazon_link identifier=”B0001MRXQG” locale=”US” tag=”scrugcorne-20″]Cafeteria trays[/easyazon_link] makes clean up so much easier! We’ve been using the same green cafeteria trays for crafts for years. Best purchase ever. If you don’t have trays, place plastic wrap or wax paper over your table to protect it from the kids.
- Little bit of scotch tape. I placed the print out on the tray with a bit of tape so it wouldn’t move.
Note: If using a ziplock bag place your print out inside of it. The below photos show our original craft from 2014.
If using plastic wrap, place your coloring page on the tray. Tape it down. Cove the tray with plastic wrap. Tape down those edges too.

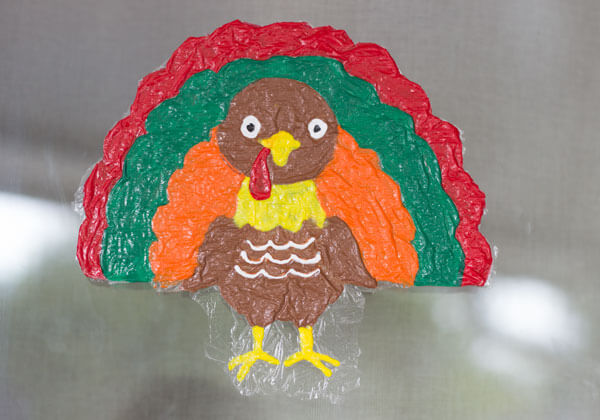
“Color in” the turkey with the paint.

I was scared of the little details so after I did the green, I went ahead and did the smaller areas.

I let the paint dry.
Why I now use ziplock bags instead of saran wrap!
Then I continued coloring in the rest of the picture. My little experiment with the cling wrap worked…and it didn’t work. It was definitely not easier to pull off the saran wrap than the wax paper. (Hence the move to the zip top bag!)
I ended up giving up because I didn’t want to stretch out or ruin the little feet. I simply cut off the cling wrap except for the feet. I left it on to give those turkey legs some structural support. However, one side of the cling still did it’s job and clung to the window. I also kind of like the shininess of the cling wrap.

All in all I thought it came out great! We will do some more this weekend because this one lonely turkey tom needs a mom to go gobble gobble gobble all day with!
Love Thanksgiving Crafts? Check out these Turkey crafts from Crafty Morning.
love these DIY Window clings! how fun and how easy to create for any holiday or season or just because! Thanks for testing and sharing the idea! Have a great Thanksgiving!
Kristina and Millie recently posted…Happy Thanksgiving to you!
Hello gorgeous! So cute! Pinned and tweeted. I hope to see on Monday at 7 pm. We love to party with you! Happy Monday~Lou Lou Girls
Lou Lou Girls recently posted…Mandarin Beef Teriyaki
I’ve never thought about making my own window clings. Found this on Come Along Ponds.
Audrey recently posted…Calabrese Antipasto and Tasty Tuesdays Link Up
Super cute! Pinned!
Monica
Monica recently posted…How to Bake the Perfect High Altitude Chocolate Cake in 12 Steps
Thanks monica!
These are so dang adorable!!!!!!
Echo recently posted…There Ain’t No Elf On My Shelf!
My kids think that we should always have window clings! I’ll be doing this craff forever lol
I love that they love it! I also love the idea you come up with!
Echo recently posted…There Ain’t No Elf On My Shelf!
I love these! I think the kids would have a blast making them!
Becka recently posted…DIY Handprint Snowmen Family Christmas Ornament
Livvy is sitting here with me and goes ‘Hey! I wanna make a TURKEY!’ Super cute, I have never tried to make window clings before… I think the plastic wrap sounds like great idea, the feet still look great and it’s clear. Fun stuff!
Savanna recently posted…Why my blog is called Rose Uncaged, plus a how-to on blog naming
They are easy 🙂 do it!