The holidays are all about traditions. My very large family always has Thanksgiving dinner together each year at my uncle’s home. We also have a lively gift exchange the Saturday before Christmas. Crafting as a family is also one of our most favorite things about the holidays. This year we did an elegant decoupage project.
As I get older, I value these traditions more and more.
Last year, I finally got the Elf on the Shelf and began the elf shenanigans. My kids love it.
This year, we are participating in the 30 days of gratitude as a family.
I have noticed that my children are at the age where they are very interested in knowing how much money is in my pocketbook. Being appreciative and thankful for what they have is something I constantly tell them. By actively thinking about and recording what they are grateful for each day, I hope they see past all the 5 and 7 year old wants to value what they already have.
Because, the truth of the matter is that my children don’t “want” for anything. They are fed, clothed, loved, educated, and entertained.
In honor of our new tradition, we made a Box of Thanks to keep all of our daily gratitudes inside. On Thanksgiving Day, we can go through them and recall all that we are grateful to have in our lives.
Decoupage Idea: Box full of thanks
Decoupage can sound like time consuming, fancy craft. It doesn’t have to be though. Decoupage is simply “covering something with paper.”
Materials
- Wooden Craft Box purchased from Michaels with a coupon
- Foam brush
- Gold acrylic paint
- Scrapbook paper
- Modge Podge or other gel medium
- Minwax Polycrylic Glossy Finish
Instructions
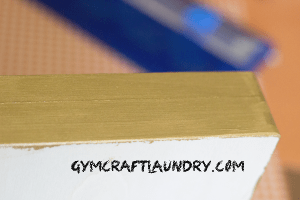
First I painted the sides of my box with the gold acrylic paint. Let dry.
Then I cut the scrapbook paper to size for the inside of the box and the top of the box.
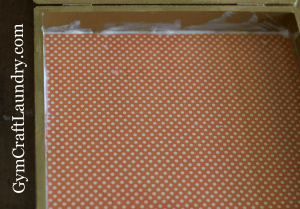
Working on the inside of the box first, I brushed on a layer of modge podge on the inside of the box.
I placed the scrapbook paper over the glue and used an old credit card to gently smooth out any bubbles. Then I put a layer of modge podge on top of the paper.
I did the same to the bottom inside of the box.
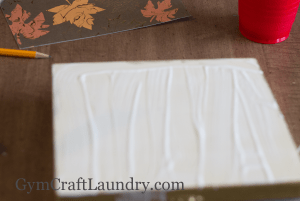
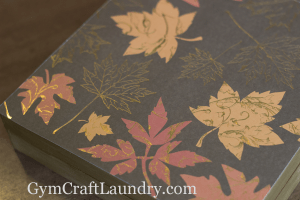
Finally I painted modge podge on the top of the box. I placed the top scrapbook paper on the glue. Again, I smoothed the paper with the credit card and brushed on a top layer of modge podge.
Once the entire project was dry, I put a coat of the Mix Wax Polycrylic on the inside of the box. Let dry. Then I brushed on the finish to the top and sides.
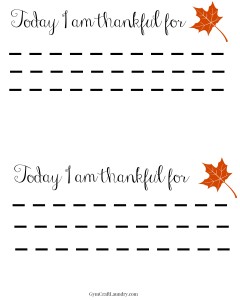
Each day we are writing down what we are each thankful on a printable template I designed and placing it in the box. Download it for free here
The box is simple and pretty enough to be displayed on a coffee table or counter. It was also quick to make!

Tanya @ Mom's Small Victories says
You are so crafty. This is a great idea for thanksgiving or year round! Thanks for sharing with #SmallVictoriesSundayLinkup and hope you join us again tomorrow!
Tanya @ Mom’s Small Victories recently posted…Travel the World in Books Reading Challenge Winter 2014-15 Events
Herchel says
I’ll be there! Thanks Tanya 🙂
Gude @HodgePodgeCraft says
Great idea – and something I feel I need to do as much as my kids do! 😉
#Pintorials
Gude @HodgePodgeCraft recently posted…Printable snowman craft for kids
Heather @ Divas Run for Bling says
Thank you for sharing. I have pinned this post to the Bloggers Brags Pinterest Party!
Heather @ Divas Run for Bling recently posted…A Healthy Thanksgiving: Honey Whiskey Apple and Sweet Potato Bake
Echo says
This is such a fantastic idea! I love it!
Echo recently posted…The Mad Mommy’s Totally Awesome Gift Guide!